Showing posts with label Side Dishes: Vegetables. Show all posts

Sunday, March 11, 2018

Asparagus Dressing

This is a simple Hollandaise-style dressing to serve with cooked asparagus. I roasted my asparagus at 425 degrees (tossed with olive oil and salt, pepper, and garlic salt first) for about 10 minutes. Older/thicker asparagus would need a bit more time. Asparagus can be served at room temperature when prepared like this. Recipe is from The Recipe Box Project and was typed on an old typewriter by PW (I think).


Asparagus Dressing

~from my grandmother's recipe box

1 T. vinegar
3 T. vegetable or canola or other neutral oil
yolk of one hard-boiled egg, mashed
1 t. Dijon mustard
Roasted asparagus

Mix dressing ingredients together, whisking until emulsified. Drizzle over cooked asparagus.

~Makes almost half a cup, enough for a couple pounds of asparagus.

Recipe card typed on an old typewriter


Thursday, September 4, 2014

Braised Lentils with Roasted Butternut Squash

True story: for the first time in 4 years, I forgot to pick up my CSA veggies. Well, I remembered, but by then, I couldn't make it work. I guess Labor Day threw off my mental "what day is it today" track. The Colvins are very forgiving types, thank goodness. I think we're going to be able to work it out for me to get a box this weekend. So, I don't know if you will be getting butternut squash this weekend or not, but if you're like me, you may still have one or two lying around. I usually eat up the more perishable stuff first. Good thing because last night, I could still whip up a meal with CSA veggies!


This recipe is simple, but takes a bit of time to cook. It's delicious, too, despite the unassuming ingredient list. I'm not a huge fan of chunks of butternut squash; generally, I prefer the pureed recipes like our favorite Butternut Squash Soup. But the combination in this recipe works beautifully. I didn't think to take a picture of all the Colvin veggies that went into this recipe, but I used onions and garlic from them in addition to the squash! This works as a good side dish for sausage (smoked, flavored chicken, etc.) as well as a vegan/vegetarian main dish.


Braised Lentils with Roasted Butternut Squash
~adapted slightly from How to Cook Everything, 10th ann. edition


  • 1 cup lentils, brown or green
  • 1 small onion or 1/2 of a large one
  • 2 cloves garlic
  • 2 c. peeled, cubed butternut squash (1/2-inch to 1-inch cubes) from a medium squash
  • 2 T. olive oil plus extra
  • 2 c. chicken or vegetable stock
  • 1/2 c. red wine (can use white for a more subtle taste)
  • 1 bay leaf
  • salt and pepper to taste
  1. Toss squash cubes with enough oil to coat and roast at 375 degrees until tender and caramelized (about 20 minutes or so). (I sprinkled some salt and pepper over the cubes as well.)
  2. Meanwhile, in a medium pot, sauté onion over medium high heat until translucent. Add garlic and stir for a minute or so until garlic is fragrant. 
  3. Add lentils, stock, wine, and bay leaf to pot. Bring to a boil. Reduce heat, partially cover, and simmer for about 25 minutes.
  4. Taste, adjust seasonings, and simmer until lentils are done to your liking. Removing the lid will help some of the excess liquid cook off (which I like). When lentils are just about done, gently stir in squash pieces to reheat.
~Serves 4-6

Wednesday, August 27, 2014

Everyday Okra


Now, we Southerners love us some okra. But my Yankee husband can't stand it. I'll eat it pickled, fried, in gumbo, in stir fries...but my favorite is this simple sautéed version. My boys like it this way, too, and when we're busy--this is the way I make it. We've been getting the perfect amount from the Colvins the past few weeks: just enough for me to indulge and to throw a pod or two to the boys.


Everyday Okra

Okra
salt
olive oil

Heat a skillet with a "pour" of olive oil in it over medium to medium high heat. In the meantime, slice the stems off the okra--if you slice right through that little black line that divides the pod from the stem, you can avoid some of the sliminess that folks find offensive. The seeds will remain covered and the pod will hold together better.

Throw in your okra and a touch of salt. Saute until pods are soft and some sides are dark brown/blackened.

This will take 10 minutes or so. Serve immediately!


Monday, August 18, 2014

Acorn Squash with Brown Sugar

A couple of weeks ago, we brought home a lovely little acorn squash in our box from the Colvins. I let it sit contentedly in its happy place on the counter for about 2 weeks before I remembered it in the chaos of starting up school. I don't have any pictures of the final dish because we scarfed that bad boy down in all its buttery, sugary goodness. One acorn squash made enough for my family to eat at one meal with zero leftovers. Petite portions, too. The recipe below is for 2 squash, but, obviously, you could halve it.

Acorn Squash with Brown Sugar
~Cook's Illustrated Cookbook


  • 2 acorn squash (1 1/2 pounds each), halved pole to pole and seeded
  • salt*
  • 3 T. butter*
  • 3 T. brown sugar
*if using salted butter, go easy on the salt; if using unsalted butter, salt away!

  1. Sprinkle squash halves with salt and place, cut sides down, in a pan big enough to hold them (13x9-inch pan, large bowl, etc.). Pour 1/4 cup water in bottom and cover with plastic wrap. Microwave for about 15 to 25 minutes, or until squash is tender and pierces easily with a knife (or fork). Remove pan from microwave and place on hot pad on counter (if your counter is too cold, this could be dangerous without a hot pad--the pan/bowl will be HOT).
  2. Preheat broiler. Melt butter and brown sugar together (add 1/8 t. salt if using unsalted butter).
  3. Transfer squash to rimmed, broiler safe baking sheet (tongs work well). Place them cut-sides up and brush with butter/sugar mixture. Broil until brown and caramelized, 5 to 8 minutes. You may need to remove some portions before others if they brown faster. Serve immediately.
~Serves 4-6

Saturday, August 16, 2014

Kale and Sweet Potato Saute


YUM. YUM. YUM.

This is amazing topped with a fried egg and eaten for breakfast. It reheats great. The sweetness of the potatoes contrasts perfectly with the taste of kale--and the Southwestern spices complement the whole mess beautifully. We get kale regularly from the Colvins, and, while I always enjoy it, this week I was desperately hoping they'd come through for me because I wanted to make this again! (And, thankfully, they did.) The author of this recipe notes that the mixture is also good topping a tostada (add queso fresco, cilantro, avocado cubes, etc.).


Kale and Sweet Potato Saute
~Brassicas


  • 2 T. olive oil, divided
  • 1 1/2 pounds sweet potatoes (2 medium), peeled and cut into 1/2-inch cubes
  • 3/4 t. kosher salt, divided
  • 1 T. chili powder, divided
  • 1 1/2 t. ground cumin, divided
  • 2 cloves garlic, minced
  • 1 medium bunch kale (about 10-ounces), center ribs and thick stems removed, leaves chopped and shredded
  • 1 T. water--or more
  1. Combine: 1/2 t. salt, 2 t. chili powder, and 1 t. cumin in a small bowl. Combine 1/4 t. salt, 1 t. chili powder, and 1/2 t. cumin in another small bowl.
  2. Heat 1 tablespoon oil in a large nonstick skillet. If using a stainless steel skillet, you will need more oil. Add potatoes and cook, stirring occasionally, for about 5 minutes. When the potatoes have started to soften, stir in the first spice mixture (and more oil if the pan is too dry). Continue cooking and stirring until potatoes are golden brown and cooked through. This will take anywhere from 8-10 minutes if your potato chunks are pretty small to quite a bit longer if you just roughly chopped them like I did.... When cooked, transfer to a bowl.
  3. Heat remaining oil and the garlic in the same skillet. When garlic sizzles, add kale a handful at a time (turning it over with tongs) until it all fits in the skillet. Stir in second spice mixture and water and cook for 5 minutes, until kale is wilted and tender. Add potatoes back to the pan and heat through.
  4. Serve as is, or top with fried eggs for breakfast, or on top of tostadas for a light dinner.
~Serves 4

Tuesday, July 29, 2014

Yellow Squash Casserole with Almonds


So many people I know these days are gluten-free, low-carb, or something similar. This casserole is delicious and very similar to classic squash casserole, but it uses both raw and roasted almonds to achieve the effect given by crackers in the original. I left my squash pieces a little larger and didn't cook them until mushy, so this casserole has more texture over all--which seemed to go over well when I served it (similar to the Microwave Squasherole already on full tummies). I also used all sorts of different summer squash since I had an assortment from the Colvins (the onions and garlic were from them, too!). I'm sure you could mix in some zucchini as well. I thought the mixture looked too runny before baking, so I added in some green beans. The casserole thickens up a lot when it cooks, so the green beans probably weren't necessary. (sorry for the poor picture quality below!)


Squash Casserole with Almonds
~adapted from this recipe on allrecipes


  • 2 T. olive oil
  • 2 t. butter
  • 2 small onions, chopped
  • 4 cloves garlic, minced
  • 8 c. chopped yellow squash*
  • 2 t. kosher salt
  • 1 t. pepper
  • 2/3 c. finely chopped/coarsely ground raw almonds
  • 2 c. shredded Monterey Jack cheese (can also use Colby Jack)
  • 1/2 c. plain yogurt
  • 1/2 c. milk (can use whipping cream instead of milk and/or yogurt)
  • 4 eggs
  • 1/3 c. chopped roasted, salted almonds
  1. Heat butter and olive oil in large skillet over medium-high heat. Cook onions and garlic in hot oil until softened, about 3 minutes. Add squash and salt and pepper and stir. Cover and cook until squash is softened, stirring occasionally (about 5 minutes). 
  2. Meanwhile, mix raw almonds and half the cheese in a small bowl. Add to cooked squash mixture. Whisk dairy and eggs together and add to squash mixture. Pour squash mixture into greased 13x9-inch casserole. Top with remaining cheese and roasted almonds.
  3. Bake at 400 degrees for 25-30 minutes or until hot and bubbly. Casserole can be assembled ahead of time and baked before dinner--it may need extra time if it's very cold.
~Serves 10-12

Wednesday, June 18, 2014

Turnip-Potato Mash


Boy is this delicious!! Turnips are lower in calories and carbs than potatoes, but when they are braised and then mashed with cooked potatoes, you can't tell. The result is a lighter version of mashed potatoes that is eagerly requested by our children whenever we get turnips in our basket from the Colvins. The Colvins had potatoes at their booth today, too, so you can get both from them! (I should note that I was most definitely not a turnip fan before I started getting them in my CSA baskets; this is one of the many vegetables we've learned to like!)


Turnip-Potato Mash
~based on Joy of Cooking, 1997 edition


  • 1 recipe braised turnips (about 1 1/2 turnips, tops off, plus chicken stock and butter)
  • 2-3 cups mashed potatoes*
*For mashed potatoes, I just bake a couple of extra potatoes a day or so ahead of time if we're having them for a different meal. If you're not having potatoes earlier in the week, just boil a few potatoes, peel them, and mash for this recipe. No need to have "mashed potatoes" all doctored up. On the other hand, if you happen to have actual leftover mashed potatoes with all their fixin's, I'm sure they'd taste great, too. This is very flexible.

Simply mash the braised turnips and add in the mashed potatoes. That's it! Braising the turnips takes a wee bit of time, but no more than making mashed potatoes from scratch. 

~Serves 6

Wednesday, June 11, 2014

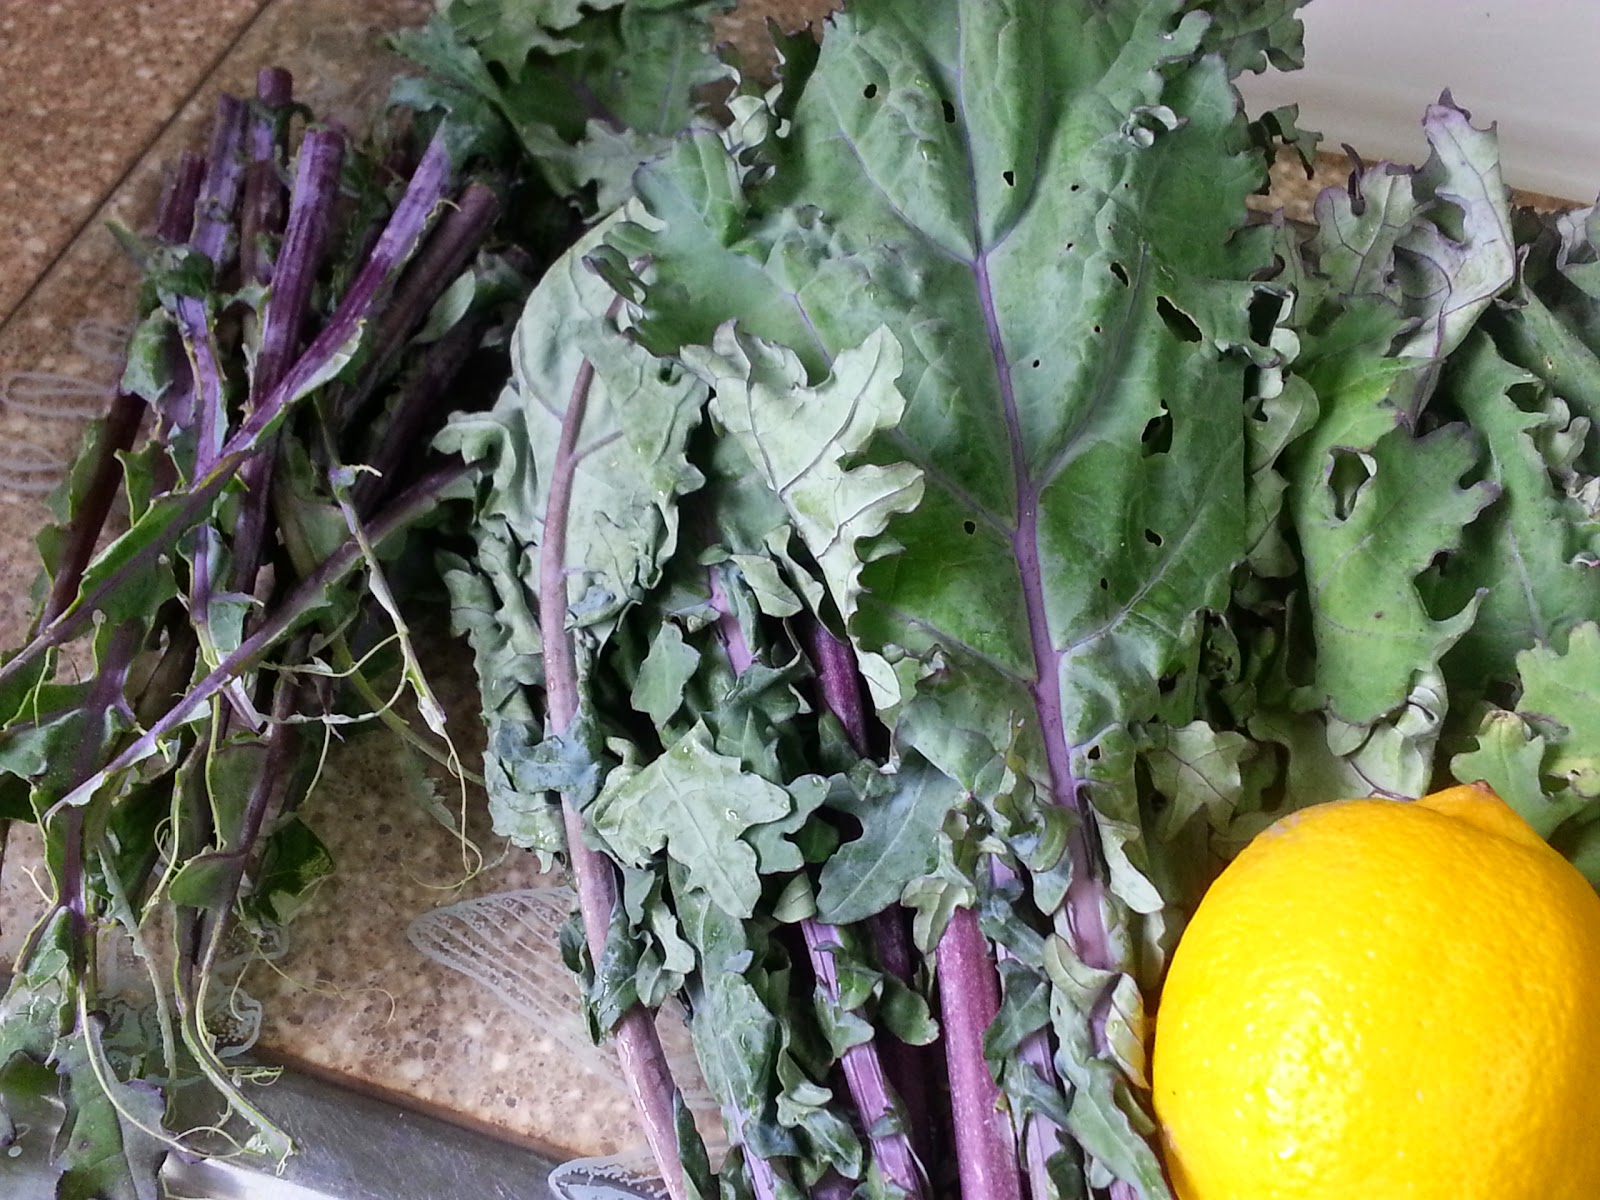
Everyday Kale

Back in the day, when I was a kale rookie, I doctored it up in various recipes, meticulously cut the stems off, cut the leaves in neat strips, and measured precisely.

Now that I'm a kale junkie (thanks for getting me to this point, Colvins!), my approach is much more casual:
I rip the leaves off the stems,


pile them on a cutting board,


and just slice/chop. It ain't pretty, but it's quick and effective for a weeknight meal. The process is the same whether I'm cooking it or making up a wilted salad. I don't even have a picture of the final cooked product since I do this quickly and serve it up when I'm not thinking "blog recipe." Here's my weeknight cooking method….

Everyday Kale


  • kale (remember, greens cook down significantly!! Don't be afraid of a large amount)
  • salt and pepper (or, better yet, Paula Deen's House Seasoning)
  • lemon
  • splash olive oil

  1. Prep the kale: wash it, rip stems off, roughly chop.
  2. Heat a skillet, drizzle oil in if it's not nonstick, and dump in kale. Stir once or twice, pour in some water (not a lot--just enough to keep it from burning), cover skillet, and cook. I think this is roughly medium heat….
  3. When kale is done to your liking, season it with salt and pepper and a squirt of lemon juice. Do not squirt lemon juice over it until you're ready to serve it; it can discolor the kale slightly. Kale is pretty sturdy and can sit a bit off heat until the rest of your dinner is ready.

Saturday, June 7, 2014

Kohlrabi Greens with Garlic

Kohlrabi is a funky-looking vegetable that is surprisingly delicious. I forgot to take a picture of the whole bulb with greens before jumping into this recipe--you can see the bulb part (also edible) in my picture of my CSA haul from the Colvins this week. The greens are very similar to collard greens, so the cooking process is similar (actually, you can use them virtually interchangeably). If you don't have enough greens from the "tops" in your CSA box, you can always do a pot of braised mixed greens. [This is also a nice recipe if you need a vegetarian version of collard greens…but who leaves out bacon if they have it on hand?!]


Kohlrabi Greens with Garlic
~from World Vegetarian


  • 1 pound kohlrabi greens (weighed after all coarse stems have been cut off; my 3 kohlrabi gave me about 1/2 a pound, so I halved the recipe)
  • 1 T. olive oil
  • 1 dried hot chile*
  • 2-3 cloves garlic, minced
  • 1/2 t. salt
*if you don't have one or want to add heat at the table, you can sub in dried red chile flakes to taste
  1. Wash leaves well and slice into thin strips.
  2. Heat oil in large pot over medium-high heat. When hot, put in dried chile, if using. Stir once. Add garlic and stir once or twice--don't let it burn! Add leaves, salt, and 2 cups water. Bring to a boil. Cover, turn down heat to low, and simmer until leaves are tender. This will take 3/4-1 1/2 hours, depending on size and age of leaves. Just let it do its thing while you decide what else to make for dinner. Like collards, these won't get meltingly soft until they've cooked a LONG time; it's okay if they still have some texture.
  3. Stir occasionally, and when leaves are done to your liking, serve them up hot!
  4. Serving suggestion: you can use the pot liquor leftover to serve over rice, dip cornbread into, or eat with beans. Or just serve the cooked greens as a side dish.
~Serves 4-6

Monday, October 21, 2013

Simple Braised Mustard Greens

Even our kids enjoy mustard greens--probably the only "greens" we can all agree on. And this is one of the simplest greens recipes I make. It's enjoyed enough to be requested for birthday dinners! This past week, we got a nice bunch in our share from the Colvins, and tonight we had them as part of my daughter's birthday dinner. I figured it was time I put this recipe here on full tummies.


A few words about mustard greens (and any greens, really). First, start with good greens. Seems obvious, doesn't it. Those big packages of "pre-washed/pre-chopped" greens often yield mostly stems. It's better to buy them loose, even though it's more work (or get them from a local farmer like we do!). And I gotta tell you: the greens we get from the Colvins are gorgeous with all this purple and green. They turn just plain green when cooked, though.

Second, make sure you wash them thoroughly--several changes of water, if necessary.


Third, weigh your bunch. This is helpful if you're not very familiar with greens and their amounts. What I have pictured above is about 12 ounces! That's all--and it's overflowing my 12 cup bowl before it's chopped. Remember, greens cook down considerably. You'll want about 4 ounces, raw, per serving. The above picture is what all those greens cooked down to!


Fourth, remove those larger stems and then chop the greens. I just fold a leaf in half like this.


Then I just slice off the stems--I don't worry if it's not perfect. If your stems aren't big, you may not need to do this at all.

Simple Braised Mustard Greens
(note the ratio, here; you can adjust this recipe up or down quite easily)

  1. Chop stems off and chop greens if you haven't.
  2. Bring water to a boil in a large pot.
  3. Add seasoning and greens, stirring until all greens have wilted (this will just take a minute or so).
  4. Cover and simmer over medium-low heat for about 10 minutes. Baby greens will take less time. You want greens to be tender but not mushy. 

  5. Drain and serve!
 ~serves 4

Wednesday, October 16, 2013

Braised Chard with Olive Oil and Rice

A few weeks ago, my friend Suzanne commented that she thinks chard is beautiful, but she doesn't like it. I've been in that camp until this summer. Now, I'd say that I'm "learning" to like it...in small doses. And this recipe below is one of the recipes we've made a couple of times. Cooked chard tastes like strong cooked spinach--a little grassy--so it goes well with things that would go well with spinach. So, when we got chard (and white carrots!) from the Colvins this past week, we made this recipe again!


Braised Chard with Olive Oil and Rice
~adapted from How to Cook Everything, 10th ann. edition

  • 1/2 pound chard, washed and trimmed*
  • 1/3 c. olive oil
  • 2 small carrots, roughly chopped
  • salt and pepper
  • 1/3 c. white rice
  • juice of 1/2 a lemon
*original recipe calls for 1 pound; we get about 1/2 pound at a time in our share, and that is PLENTY for me in this recipe. In addition, I upped the rice from 1/4 cup to 1/3 cup. 
  1. Wash chard again (one washing isn't usually sufficient for leafy greens!). Slice ends off stem--any frayed or "old" looking ends. Separate leaves from stems. Slice stems (like you would celery) and cut leaves into wide ribbons. Keep separate.
  2. Put all but a tablespoon of the oil in a large skillet over medium heat. When hot, add chard stems and carrots, sprinkle with salt and pepper, and cook about 15 minutes, stirring occasionally. 
  3. When chard is tender, add chard leaves, more salt and pepper, the rice, and 1 3/4 cups water. Cover and simmer for about 30 minutes, or until water is absorbed (you may have to lower the heat). You're looking for a moist mixture, not a soupy one. 
  4. Can be served hot or at room temperature. Before serving drizzle with remaining olive oil and lemon juice.
~serves 4-6

Tuesday, September 24, 2013

Italian Veggie Bake


This is delicious and can be made ahead! The vegetables listed below are the original list--sort of like a ratatouille--but we don't like eggplant or mushrooms, so I sometimes leave those out and just add extra squash and/or peppers. We got a great looking assortment of squash and peppers from the Colvins this week, so that's primarily what I used.


Italian Veggie Bake
~Out Here cookbook

  • 1/3 c. Italian dressing (any kind: homemade, storebought, light, etc.)*
  • 1 large onion, chopped
  • 1 small unpeeled eggplant, cubed
  • 1 medium zucchini, cubed
  • 1 large red pepper, cubed
  • 1 fresh package (6 oz.) sliced mushrooms
  • 1 can (14.5 oz) Italian-style stewed tomatoes, drained and diced (or 2 c. fresh, diced tomatoes)*
  • 1/3 c. shredded Parmesan cheese
  • 1 T. chopped parsley, optional
 *"Light" Italian dressing is often sweeter as are stewed tomatoes. These make the dish a bit sweeter--which many folks (especially children) enjoy.

  1. Heat salad dressing in a large skillet over medium heat. 
  2. Add onion and cook 5 minutes or until tender.
  3. Add eggplant and cook for 5 minutes, stirring occasionally (if not using eggplant, just cook the onion for the additional 5 minutes before moving on).
  4. Add remaining vegetables except tomatoes and cook for 5 minutes, stirring occasionally.
  5. Add tomatoes. Bring to a boil. Reduce heat to love, cover, and simmer 15 minutes or until tender, stirring occasionally.
  6. Pour mixture into a casserole dish (I use a 13x9-inch dish). Sprinkle with cheese.
  7. Bake at 350 degrees for 25-30 minutes or until heated through. You can also refrigerate at this point and bake tomorrow!
  8. Sprinkle with parsley just before serving.
 ~Makes 14 1/2-cup servings

Thursday, September 12, 2013

Roasted Green Beans

Man, oh man, if you've never tried roasting green beans, you're in for a treat. My husband is the one who got us started down this road. As soon as we got green beans from the Colvins this summer, we made these. Mmmmm

Roasted Green Beans

  • green beans, fresh or frozen
  • olive oil
  • salt and pepper
  • seasonings*

For fresh green beans: trim beans, cut into 3- to 4-inch lengths, and parboil for 2 minutes. Drain and rinse in cold water. Pat dry.

For frozen green beans: let beans thaw (I leave them out on the counter during the day). Drain and pat dry.

*Seasonings: we like Paula Deen's house seasoning (salt, pepper, garlic powder, onion powder) or salt and pepper plus onion powder or salt plus garlic powder. Alternately, toss the beans in garlic-flavored olive oil and add salt. Salt and garlic are the essentials here.


Toss beans in olive oil and seasonings of choice. Spread out on jelly roll pan or in roasting pan. You don't need a single layer, but you also don't want them piled high. Roast at 400-425 degrees (or even 450), stirring every few minutes, until desired tenderness. The outsides will shrivel slightly. At 425 degrees, they take roughly 20-30 minutes or so (also depends on how soft they are to start with; thawed beans from frozen start out a touch softer).


Enjoy!!

Saturday, September 7, 2013

Easy Roasted Veggies

I don't know what it is about roasting, but vegetables come out of that oven a totally different breed than by any other cooking method. We've yet to find a vegetable (save, perhaps, for lettuce and spinach and the like) that can't be roasted successfully. Mixtures are nice, but so are single vegetable dishes. A couple of weeks ago, we had a lovely assortment of veggies from the Colvins that practically begged to be roasted: fennel, summer squash, tomatoes bell peppers (see the picture below)--I tossed the whole mixture with a balsamic vinaigrette that had fresh basil (also from the Colvins) in it, but the simple method listed below works a base no matter what else you plan to do with them. This week, we got more summer squash and some bell peppers in our CSA box, and I added a carrot, sweet potato, and a couple of white potatoes into the mix. Mmmmm


What can you do with roasted vegetables, besides use them as a side dish? Top a pre-baked pizza crust with them, add a little cheese, and pop back in the oven briefly. Toss them, cold, with some greens and salad dressings. Add them to a wrap. Mix them with some rice and add some extra seasoning/salsa/salad dressing. You get the picture. Possibilities are nearly endless.


Easy Roasted Veggies--basic method

Assortment of prepared vegetables*
Olive oil
salt and pepper or other seasoning blend (we've used Herbes de Provence, Cajun seasoning, Adobo/Fajita seasoning, Paula Deen's House Seasoning, ....)

Alternately, you can just use a vinaigrette--homemade or storebought--instead of the oil and seasonings.


Toss prepared vegetables with oil and seasonings. Spread out on a jelly roll pan; you may need two pans if you roast a lot of vegetables at once. They don't need to be in a single layer, but you also don't want them piled too high. If you're roasting tomatoes, keep them separate from the big mixture and roast them at the end of the pan in their own area. They will release lots of juice--which is delicious--but you might not want the whole mixture to taste like tomatoes.

Roast at 400-450 degrees until tender. Vague, huh? That's because the temperature and time are both flexible (do you want them done sooner? use a higher temperature and chop them smaller. Have a roast in the oven at 400 degrees? Use that temperature and go with it.). Roasted vegetables don't have to be piping hot to be enjoyed. As long as the harder vegetables (potatoes, carrots) are in small bite-size chunks, you're looking at about 20-30 minutes. Stir every 5-10 minutes, depending on oven temperature and size of vegetable chunks.

*Vegetable Preparation:

Peel vegetables like sweet potatoes, winter squash, and any other vegetable you might normally peel before eating (except for garlic). Cut all veggies into appropriate sized pieces, remembering that vegetables like summer squash and tomatoes will cook faster than vegetables like sweet potatoes. If you're roasting a mixture, cut up harder vegetables into smaller pieces (you'll notice that my sweet potatoes in the picture above are cut fairly thin). For vegetables like green beans, you may want to blanch them first.

Saturday, August 31, 2013

Baked Acorn Squash with Apple-Pear Stuffing

Acorn squash can sometimes be bland, and its texture is not as creamy as butternut. But it makes a terrific vehicle for this apple-pear stuffing and is perfect for fall. We got some acorn squash this week from the Colvins, and this is what we did with it. If you just want to bake or roast a winter squash, follow the same procedure minus the stuffing directions (you can also raise the temperature and bake it for less time; winter squash are very forgiving). We found that this reheated well, too--the flavors were even better on day two!

Baked Acorn Squash with Apple-Pear Stuffing
~Joy of Cooking, 1997 edition

  • 2 medium acorn squash, halved and seeded
  • 2 large apples, peeled, cored, and diced
  • 1 ripe pear, peeled, cored, and diced
  • 1/4 c. raisins
  • 2 T. brown sugar
  • grated zest of 1 small orange
  • 1/4 t. cinnamon
  • 1/8 t. nutmeg
  • 2 T. butter
  • 1/4 c. apple cider or orange juice (use the juice from the orange you zested)
  1. Preheat oven to 325 degrees. Place squash, cut-sides down, in a baking dish and fill the bottom with 1/4-1/2 inch of water. Bake squash for 45 minutes.
  2. Mix apples, pear, raisins, brown sugar, zest, and spices in a medium bowl.
  3. Heat butter in a large skillet over medium heat. Add the fruit mixture and cook until the fruit browns slightly--about 5 minutes. Stir in juice and cook for another 8-10 minutes, or until fruit is tender (but not falling apart). 
  4. When squash have baked for about 45 minutes, remove from oven and pour off water from pan. Place squash cut-side up and fill cavities with fruit mixture, mounding it up a little if necessary. Bake for another 15-20 minutes or until squash is tender.

 ~4-6 servings, depending on how big your squashes are


Saturday, August 24, 2013

Spinach, Arugula, and Carrot Saute with Fresh Herbs


All three of my kids ate this and proclaimed it good! I didn't give them much more than a couple of bites, but it was the first thing they ate (and they liked the rest of our dinner just fine, so it wasn't a case of avoiding a lesser-liked item). The cookbook this comes from is one I would never have thought of checking out from the library a few years ago, but I've since learned that vegan cookbooks can be great sources of good vegetable dishes (go figure). The cookbook author describes this as a "fresh-tasting saute that's ready in minutes." That's exactly what it is. And, it's a great introduction to cooked greens because it doesn't have that earthy, pungent "cooked greens" flavor you get with longer cooked greens like mustards or collards. We got some nice arugula from the Colvins two weeks in a row, so I decided to try it in something other than a salad. A great discovery!


Spinach, Arugula, and Carrot Saute with Fresh Herbs
~from Wild About Greens, titled in there "Spring Greens Saute with Carrots, Mint, and Chives"

  • 2 T. olive oil (can use canola)
  • 2 to 3 cloves garlic, minced
  • 12 or so baby carrots or 3-4 regular carrots; baby carrots quartered lengthwise (or into 8ths depending on width) and regular carrots cut into thick matchsticks
  • 6 to 8 oz. baby spinach, thick stems removed*
  • 2 to 4 oz. baby arugula, thick stems removed*
  • 1 T. lemon juice, or to taste (I used half a lemon's worth)
  • 8 to 12 fresh mint leaves, slivered
  • minced fresh chives to taste (~1 tablespoon)
  • salt and pepper to taste
*remember that greens always look like too much before they're cooked because they cook down so much. I used the full amount of arugula (and it wasn't "baby") and the 6 ounces of spinach.
  1. Heat oil in big cast iron skillet, regular skillet, or large pot (you'll need good-sized sides, so factor that in).
  2. Saute carrots and garlic for a minute or two over low-medium heat.
  3. Toss in greens, a handful or two at a time, and stir around until slightly wilted before adding next handfuls. Tongs work well for this. Stir-fry for about 3 minutes or until just barely cooked and still bright green.
  4. Stir in seasonings and serve!
 ~Serves 4

Friday, August 23, 2013

Summer Squash with Basil


YUM YUM YUM

I could stop there, but I'll add that the kids enjoyed this one, too, even though they're not squash fans. It's easy and, in the summer, inexpensive. We got our squash and basil both in our CSA basket two weeks in a row. Thanks, Colvins!


Summer Squash with Basil
~inspired by a similar recipe in the 1997 ed. of Joy of Cooking that uses parsley

Yellow summer squash, chopped into 3/4-inch pieces (we used 4 medium-sized squash)
Olive oil
Minced garlic (2-3 cloves, depending on amount of squash)
Snipped fresh basil (about 1/3 cup)

Pour in some olive oil into a nonstick or cast iron skillet and heat over medium heat. When hot, toss in squash and saute for a few minutes until it's starting to get tender. Raise the heat if you want to cook it faster. We like ours still a touch firm/crunchy.

When squash is pretty much ready, toss in basil and garlic cloves and stir a few times.

Enjoy!

~Serves 4-6

Monday, June 24, 2013

Old-Fashioned Squash Casserole

This is the squash casserole I grew up eating (and loving). For some reason, it's hard to find a recipe like this in contemporary cookbooks. And yet, if you're from the South, it's one of those dishes that says "home." Mmmm.... When I got some lovely yellow summer squash and some fresh onions from the Colvins this week, I could hardly wait to make this!


Unlike most of my recipes, I'm featuring some more step-by-step pictures--partly because I've had such a hard time finding this recipe and am guessing there are a number of folks who've never made it. And I'd be remiss not to point out that adding a little chopped bacon never hurts! [See below for a short-and-sweet version]

Old-Fashioned Squash Casserole
~from The Chattanooga Cookbook (unfortunately, it's out-of-print)

  • 6-8 young summer squash
  • 1 medium onion
  • 2 eggs, beaten
  • 1/2 stick butter (1/4 c.)
  • 1/2 cup shredded Cheddar cheese
  • 1/2 c. milk
  • 12 Saltines
  • salt and pepper to taste


Parboil 6-8 squash in salted water 'til tender (5-10 minutes; test with fork for tenderness).


Meanwhile, finely chop 1 onion. Saute in small amount of butter and/or bacon grease (I *always* use bacon grease--about 1/2 T. or so?).


Drain squash well


and mash it.


To the hot squash, add onions, 1/2 cup grated Cheddar cheese, 1/2 stick butter, 1/2 cup milk and 2 eggs mixed together, and 6 crumbled Saltines. Add 1/8-1/4 teaspoon sugar. Taste for salt/pepper.


Put in buttered casserole and top with more cracker crumbs (~6 more crackers).  Bake for an hour at 300 degrees.

~Serves 6-8

Short-and-Sweet Text-Only:
Parboil 6-8 summer squash in small amount of water until fork tender.  Meanwhile, finely chop 1 onion. Saute in small amount of butter and/or bacon grease (I *always* use bacon grease--about 1/2 T. or so?). Drain squash well and mash it. To the hot squash, add onions, 1/2 cup grated Cheddar cheese, 1/2 stick butter, 1/2 cup milk and 2 eggs mixed together, and 6 crumbled Saltines. Add 1/8-1/4 teaspoon sugar. Taste for salt/pepper. Put in buttered casserole and top with more cracker crumbs (~6 more crackers).  Bake for an hour at 300 degrees.

Monday, June 10, 2013

Tennessee Turnips Supreme

I'm not much of a turnip fan. Oh, I discovered a few ways to enjoy them during last year's CSA season, but I definitely am not seeking them out on my own. That may all change. This recipe is delicious! Even one of the kids pronounced it delicious!! (can you hear those exclamation points in a 7-year-old's tone of voice?) The original recipe on Allrecipes is called Southern Turnips Supreme, but since the author of the recipe cites Tennessee in her description, and since my turnips are FROM Tennessee, I've changed the name :-). Note: we had good, fresh turnips from the Colvins (about 3 inches in diameter), not ones that had been stored a long time. That probably changes the dish a bit since older, bigger turnips are more fibrous.

Tennessee Turnips Supreme
~from allrecipes

  • 1 cube vegetable bouillon*
  • 1 cup water*
  • 3 cups peeled, cubed turnips
  • 1/4 c. minced onion
  • 2 cloves garlic, minced
  • salt and pepper to taste
  • 1 1/2 T. sour cream
  • 1/2 c. shredded sharp white Cheddar cheese
  • chopped fresh parsley for garnish
*You may also use a cup of chicken or vegetable stock in lieu of these two ingredients.
  1. Place the vegetable bouillon cube into a saucepan with the water, and bring to a boil over high heat. Cook until the bouillon cube dissolves, about 1 minute. 
  2. Stir in the turnips, onion, and garlic, return to a boil, cover, reduce heat slightly, and cook the mixture until the turnips are tender, about 10 minutes. Reduce the heat to a simmer, and cook until most of the liquid has been evaporated, 10 to 15 more minutes.
  3. Lightly stir in the sour cream to coat the turnips. Sprinkle with salt and pepper, and top with shredded Cheddar cheese and parsley.
 ~Serves 4